
Chicken Jalfrezi
Ruby ka Kitchen
Chef
“Ruby Abid, known as Chef Ruby of “Ruby Ka Kitchen,” is a Pakistani‑origin YouTube food creator who simplifies Indian‑Pakistani recipes for global home cooks, combining tradition with accessible, family‑friendly cooking tutorials.”

Aarif
Food Journalist
Aarif is a devoted content writer at Regional Heritage Food (RHF), passionate about cooking and travel. He shares his culinary experiences and discoveries, inspiring others to explore new recipes and flavors.
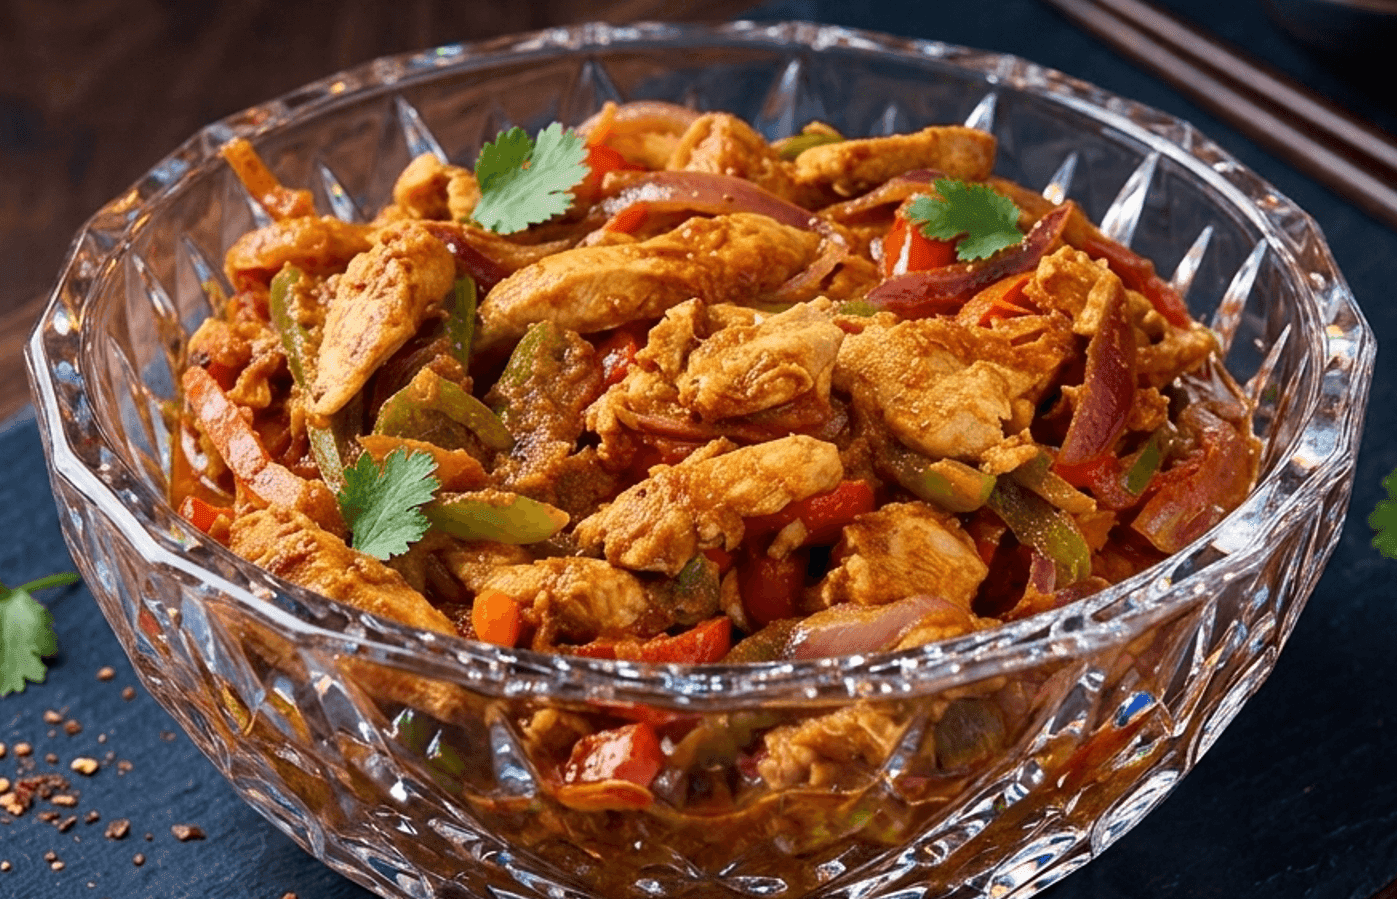
Stir-Fried Chicken Jalfrezi with Bell Peppers, Whole Spices, and a Bold Tomato-Onion Masala
Chicken Jalfrezi is one of those dishes that looks fancy on the plate but is actually very simple to make at home. It is a stir fried chicken curry where the chicken cooks in a rich tomato and onion masala, and then fresh capsicum and onion are tossed in at the end to keep things crunchy and colorful. The whole dish comes together in about 45 minutes and tastes like something you would order at a good restaurant.
What makes Jalfrezi special is the way it balances two things at once. The base masala is slow cooked so it becomes thick and full of flavor. But the vegetables go in right at the end over high heat for just a minute or two, so they stay bright and a little crisp. That contrast is what gives Jalfrezi its personality. It does not taste like a regular curry where everything has been cooked down together. The capsicum and onion rings actually stand out, and you can taste them separately from the masala underneath.
This dish originally came from the Indian subcontinent and the word jalfrezi actually refers to the stir fry technique used to cook it. Over time it became hugely popular across Pakistan, India and even in British curry houses. The recipe you are about to follow is Ruby Ka Kitchen's version which keeps things practical and honest. No complicated steps, no fancy ingredients, just good technique and the right spice balance to get that bold, satisfying flavor that makes Jalfrezi so hard to stop eating.
Why This Recipe Works Better Than Others
The Masala Is Built in Two Separate Stages
A lot of home cooks throw everything into the pan at once and end up with a watery, uneven curry. This recipe separates the cooking into two clear parts. First you build a deep, jammy masala by cooking down the finely chopped onion and tomatoes all the way until the oil floats to the top. That takes patience but it creates a strong flavor base. Then separately, at the very end, you stir fry the sliced onion rings and capsicum for just about a minute. These two types of onion do completely different jobs in the dish, and keeping them apart is what gives this Jalfrezi its layers of flavor and texture.
Ginger Garlic Paste Gets Properly Fried Before Anything Else Joins It
This is one of the most common mistakes people make. They add the ginger garlic paste along with the onions and it never really cooks through properly. You end up tasting raw garlic in the finished dish. In this recipe the paste goes in alone after the onions have browned, and it gets a full minute of frying on medium heat. This step converts that sharp raw smell into something warm and mellow that supports all the spices coming after it. It is a small change that makes a big difference to how the finished curry tastes.
Each Spice Goes into the Pan at the Right Moment
Cumin seeds go first into hot oil on their own because they need direct heat to bloom properly. The ground spices like red chilli and turmeric go in with the tomatoes where the moisture stops them from burning. Garam masala is added last with the heat turned down because it is fragrant and delicate and high heat will destroy its aroma before it ever reaches the plate. This order follows what each spice actually needs to perform well, and the result is a curry where you can taste every layer rather than a flat single note spice hit.
The Capsicum and Final Onion Only Get About One Minute of Cooking
This is the heart of what makes Jalfrezi different from other Pakistani chicken curries. The sliced capsicum and onion rings are not simmered into the gravy. They are added right at the end on high heat and tossed for sixty to ninety seconds at most. That is enough to warm them through and get a slight char on the edges without cooking out their crunch or their color. Most home versions overcook the vegetables and the dish ends up looking and tasting like a regular curry. Keeping that stir fry moment short is what makes this look and taste like a proper Jalfrezi.
Cooking to Oil Separation at Each Stage Tells You When to Move Forward
Oil separation is not a sign of something going wrong. It is the sign that the water has cooked off and the masala is ready for the next ingredient. This recipe checks for oil separation twice: once after the tomato masala has cooked down, and once more after the chicken has been frying in that masala. If you move on before the oil separates you are carrying raw tomato water forward and the finished dish will taste thin and sharp. Waiting for that visual cue is the most reliable way to know your masala is actually ready.
prep time
20 min
cook time
30 min
Servings
4
Ingredients
- Boneless chicken500 g
cut into 1.5 inch pieces
- Oil4 tbsp
- Cumin seeds1 tbsp
- Onion2 piece
1 finely chopped for masla base, 2nd sliced into ring for stir fry
- Ginger garlic paste1.5 tbsp
Method
Get Everything Ready Before You Turn the Heat On
Wash and dry the chicken pieces well. Pat them dry with kitchen paper because wet chicken will steam in the pan instead of frying, and you want the pieces to get some color on them.
Chop one large onion as finely as you can for the masala. The finer it is chopped the more completely it will melt into the tomato base as it cooks down.
Roughly chop the tomatoes. Then slice the second onion into rings and cut the green capsicum into strips. Try to keep the strips and rings roughly the same size so they cook evenly when you toss them in at the end.
Slice the green chillies lengthwise. This keeps them big enough to find in the dish and gives little pockets of heat rather than spreading chilli flavor everywhere.
Measure all your ground spices into a small bowl except the garam masala. The garam masala goes in at a different time so keep it separate.
Chef's Tip:
Dry chicken fries well. Wet chicken just boils in its own water. If your chicken has been sitting in a marinade or was washed and not dried, spread it on a tray lined with kitchen paper and leave it for ten minutes before it goes in the pan.
Start the Masala with Cumin, Onion and Ginger Garlic
Heat four tablespoons of oil in a wide heavy pan over medium high heat. To test if the oil is hot enough drop one cumin seed in. If it sizzles right away and floats up the oil is ready.
Add all the cumin seeds and let them sizzle for about twenty to thirty seconds. They should turn a warm golden brown and smell nutty and toasty. Do not walk away at this point because cumin goes from perfectly done to burned very quickly.
Add the finely chopped onion and cook on medium heat for six to eight minutes, stirring every now and then, until it turns a deep golden brown color and has reduced in size quite a bit.
Add the ginger garlic paste and fry it on medium heat for a full minute, stirring it through the onions the whole time. Wait until that sharp raw smell softens before you move on.
Chef's Tip:
The onion needs to be genuinely golden brown here, not just soft and pale. Pale onions give you a watery sweet masala without much depth. If you add a small pinch of salt with the onions it helps draw out their moisture and they brown faster.
Add Tomatoes and Spices and Cook Until the Oil Separates
Add the chopped tomatoes to the pan. Stir everything together and cook on medium heat for four to five minutes. Press the tomatoes against the pan with your spoon to help them break down and release their liquid faster.
Once the tomatoes have softened and started to fall apart add the red chilli powder, turmeric and coriander powder all at once. Add about two tablespoons of water so the spices do not stick to the pan or burn.
Keep cooking on medium heat for another four to five minutes, stirring often. The masala will get wet first as the tomato liquid comes out, then it will start to tighten again as the moisture cooks off.
Keep going until you can see the oil starting to separate and appear around the edges of the masala. The mixture should look thick and jammy. This is your first checkpoint. Do not move forward until you see this.
Chef's Tip:
If the masala is sticking to the pan before it has released its oil the heat is a bit too high. Just turn it down a little and add a small splash of water. The spices need time to cook through slowly in moisture. Rushing this stage leads to burned spices that taste bitter instead of warm and deep.
Add the Chicken and Cook It Through in the Masala
Add the chicken pieces to the masala and stir so every piece gets coated. Turn the heat up to medium high.
Fry the chicken in the masala for three to four minutes without putting a lid on, turning the pieces regularly. The chicken will release some water, the pan will get wetter and the masala will loosen. That is completely normal so do not panic.
Keep frying until that water has cooked off and the masala is clinging tightly to the chicken again. The oil should separate for the second time and the pan should look almost dry without any liquid pooling at the bottom.
Once you reach that point turn the heat down, add one tablespoon of water if the pan looks very dry, and cover the pan with a lid. Cook on low heat for ten minutes so the chicken finishes cooking all the way through to the middle.
Chef's Tip:
If your chicken pieces are thicker than usual the covered cook may need to go for fifteen minutes instead of ten. You can check by pressing a piece firmly with a spoon. Fully cooked chicken feels firm and springs back a little. If you are not sure just cut the thickest piece open and look at the center. It should not be pink at all.
Stir Fry the Capsicum and Onion on High Heat for Just One Minute
Take the lid off and turn the heat up to high. Push the chicken to the sides of the pan so you have a clear space in the middle. If your pan is small you can do this step in a separate small pan with a tiny bit of oil.
Add the sliced onion rings, capsicum strips and green chillies into the cleared space. Stir fry everything on high heat for sixty to ninety seconds. You want the edges of the capsicum to get a tiny bit of char and the onion rings to soften just slightly while still having a crunch in the middle.
Fold the stir fried vegetables through the chicken and masala. They should be visible and distinct sitting on top of and through the dish, not dissolved into the sauce.
Chef's Tip:
Set a timer for one minute and stick to it. The moment the capsicum loses its bright color and goes limp is the moment your Jalfrezi stops being a Jalfrezi and becomes just another curry. When in doubt take it off the heat a little early.
Finish with Garam Masala, Lemon Juice and Fresh Coriander
Turn the heat down to medium low. Sprinkle the garam masala evenly over the dish and fold it through gently. Let it cook for two minutes. That is enough time for the aroma to come through without burning off.
Squeeze one tablespoon of fresh lemon juice all over the dish and stir it in. This small step brightens everything and cuts through the richness of the spiced masala. Please do not skip it.
Scatter a good handful of chopped fresh coriander over the top and serve right away with naan, chapati or plain basmati rice.
Chef's Tip:
Serve the Jalfrezi straight from the pan or into a pre warmed serving bowl. The capsicum continues to soften if it sits in a cold dish, and the masala will thicken against a cold surface quite fast. A warm bowl keeps the vegetables at the right texture all the way to the table.
The One Thing That Separates a Great Jalfrezi from an Average One
Most people who try to make Jalfrezi at home end up with something that tastes good but looks and feels like a regular curry. The chicken is soft, the vegetables are fully cooked through, and the masala is wet and poured around everything. That is not bad food but it is not really Jalfrezi.
The real difference is in how you treat the vegetables at the end. The capsicum and onion rings are not part of the curry base. They are the final layer, added fast on high heat and kept crunchy on purpose. That contrast between the rich slow cooked masala underneath and the bright fresh vegetables on top is what makes Jalfrezi feel exciting to eat.
Be patient with the masala and fast with the vegetables. Those two things together will get you a result that feels genuinely restaurant quality at home.
Nutritions
Per serving (~180g of chicken jalfrezi with vegetables and masala)
People Also Ask
Yes you can, but you will need to cook it a bit longer. Bone in pieces take more time to cook through near the bone so extend the covered low heat stage in Step 4 from ten minutes to about eighteen or twenty minutes. The bone adds a nice depth to the masala during that longer simmer. Everything else stays the same including the stir fry at the end which still only needs about sixty to ninety seconds on high heat regardless of which cut of chicken you used.
Of course. Red and yellow capsicum work beautifully alongside the green and make the dish look very colorful. Baby corn sliced thin stir fries in the same short window and adds a nice crunch. Mushrooms are also popular and go in during the stir fry stage. Just avoid adding very watery vegetables like zucchini or spinach because they release a lot of liquid exactly when you do not want it, which undoes the dry thick masala you worked hard to build up.
It is almost always one of two things. Either the masala was not cooked down to oil separation before the chicken went in, which means the tomato water is still in there and keeps making the dish wet. Or the capsicum and onion were added too early and ended up simmering in the curry and releasing their water into it. Make sure you wait for the oil to visibly separate after the tomato stage, and only add the final vegetables in the last sixty to ninety seconds on high heat. Those two fixes will sort out a watery Jalfrezi almost every time.
Keep it in a sealed container in the fridge for up to two days. When you reheat it add a couple of tablespoons of water to the pan and warm it on low heat, stirring gently. The capsicum will be softer after it has been stored overnight and that is normal. If you are making this dish ahead for a dinner party stop cooking after Step 4, before the stir fry finish, and refrigerate it there. When you are ready to serve reheat the chicken and masala and then do the capsicum and onion stir fry fresh. That way the vegetables stay crisp and the dish tastes like it was just made.