
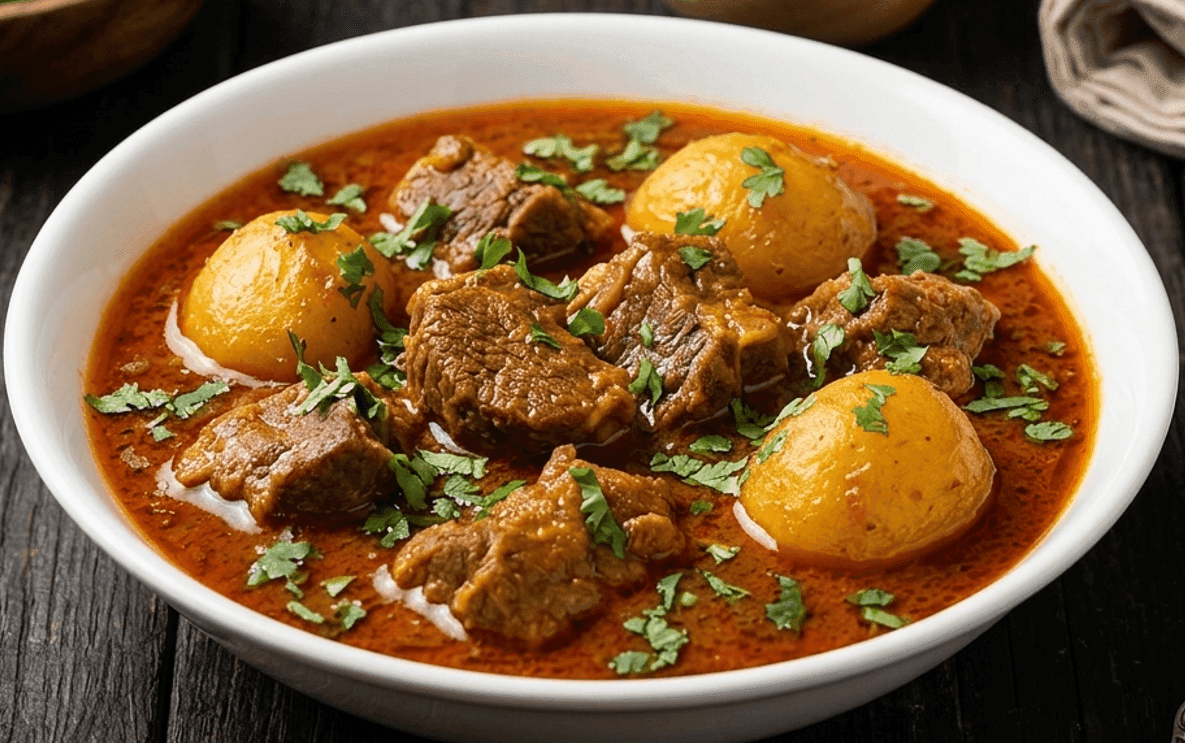
Aloo Gosht
Kun Foods
Chef
“Afzal Arshad, creator of Kun Foods, is a Pakistani chef known for his YouTube channel where he teaches viewers to recreate famous restaurant dishes at home. His clear, educational videos and focus on food safety have earned him millions of followers across YouTube, Facebook, and TikTok, making him a leading figure in Pakistan’s food vlogging scene”

Aarif
Food Journalist
Aarif is a devoted content writer at Regional Heritage Food (RHF), passionate about cooking and travel. He shares his culinary experiences and discoveries, inspiring others to explore new recipes and flavors.
Tender Bone-In Beef Slow Cooked with Potatoes in a Rich Spiced Shorba
Aloo Gosht is one of the most ancient everyday dishes in South Asian cooking. Food historians trace its roots back to the Mughal era in the 17th century when the royal kitchens of the subcontinent began combining slow cooked meats with locally grown vegetables to create nourishing one pot meals for large households. The Mughals were known for their love of rich and layered flavors and this dish carries that heritage in its careful spice balance and long slow cooking method.
The name itself is beautifully direct. Aloo means potato in Urdu and Hindi and Gosht simply means meat. When the potato arrived in the Indian subcontinent through trade routes from South America in the 17th and 18th centuries it was quickly adopted into local cooking. Home cooks discovered that adding potatoes to meat curries was a brilliant way to stretch a meal further while also adding a texture and flavor that balanced the richness of the gosht. What started partly as a way to make meat go further quickly became a dish people cooked for its own sake.
Over the centuries Aloo Gosht became a symbol of Pakistani and North Indian home cooking. It is the dish that smells like home. In Lahore you find it served with a rich dark shorba over plain rice on cold mornings. In Karachi it often comes with a thicker masala base and fresh naan fresh off the tandoor. In the villages of Punjab it is cooked in large handis over open fire for family gatherings and celebrations. Every region puts its own small stamp on the recipe but the heart of the dish stays the same. Bone in meat. Potatoes. A slow cooked gravy. And the kind of warmth that only a pot of Aloo Gosht can give.
This recipe follows Kun Foods' authentic approach where every step is practical and results driven. No shortcuts that sacrifice flavor and no unnecessary steps that waste your time. Just a clean honest method that gets you the real thing.
Why This Recipe Works Better Than Others
Bone-In Beef Creates a Shorba That Boneless Meat Never Can
A lot of home cooks use boneless beef because it is easier to find and quicker to cook. The problem is that most of the flavor in a traditional Aloo Gosht comes from the collagen and marrow in the bones. As the bone-in pieces simmer slowly that marrow dissolves into the gravy and gives it a body and depth that you simply cannot fake with boneless meat. The shorba in this recipe has that real weight to it because the meat cooks on the bone. If you have ever wondered why your Aloo Gosht tastes good but not quite like the kind you get at a proper Pakistani home kitchen, the bone is almost certainly the answer.
Bhunai Is the Heart of the Masala and You Cannot Rush It
Bhunai is the Pakistani technique of frying the masala over medium to high heat while stirring constantly until all the moisture has been driven out and the oil separates around the edges of the pan. Many home cooks skip this step or cut it short and the result is always a raw tasting slightly sour curry that never quite comes together. This recipe takes the bhunai seriously. You fry the onions until genuinely golden, you cook the ginger garlic paste until the sharp raw smell is fully gone and you fry the meat in the masala until the oil separates completely before adding any water. That is what gives this Aloo Gosht its deep roasted flavor underneath all that spice.
The Potatoes Go in at the Right Time and Not Before
Adding potatoes too early is the most common mistake in this dish. If the potatoes go in while the meat is still tough they will overcook and dissolve into the gravy before the beef is ready. You end up with a murky mushy curry with no potato texture left at all. This recipe adds the potatoes only after the meat is about 70 percent done which means they have enough time to cook through fully and absorb the flavor of the shorba without falling apart. The result is a potato that holds its shape, gives a little resistance when you bite into it and has soaked up all that beautiful spiced gravy from the inside out.
Whole Spices Go in at the Start and Ground Spices Come Later
Whole spices like black cardamom, cinnamon and cloves need direct heat and time to release their oils properly. They go into the hot oil at the very start before the onions so they get that full bloom. Ground spices like red chili, turmeric and coriander on the other hand go in with the tomatoes because the moisture in the tomatoes stops them from burning and helps them cook into the masala evenly. Garam masala is always added at the very end on low heat because it is delicate and loses all its fragrance if it hits high heat. Each spice goes in at the moment it performs best and that order is exactly what this recipe follows.
Oil Separation Is Your Progress Check at Every Stage
This recipe checks for oil separation twice. Once after the tomato masala has cooked down before the meat goes in and once more after the meat has been bhunoed in the masala before the water is added. These two moments tell you that the water content in the ingredients has fully cooked off and the flavors have had time to develop properly. If you add water before seeing oil separation at either of these stages you are carrying raw uncooked masala forward into the final dish. It will taste thin and unfinished no matter how long you simmer it after that. Waiting for those visual cues is the simplest and most reliable way to build proper flavor.
prep time
20 min
cook time
1h 15m
Servings
5
Ingredients
- Bone-in beef1 kg
boti cut, medium pieces
- Oil0.5 cup
- Onions2 pieces
thinly slices
- Ginger garlic paste2 tbsp
- Tomatoes2 pieces
roughly chopped
Method
Get Everything Ready Before the Heat Goes On
Wash the beef pieces under cold water and pat them completely dry with kitchen paper. Wet meat will steam instead of sear and you will lose that brown crust on the pieces that adds flavor to the masala later on.
Peel and thinly slice both onions. The thinner the slices the faster and more evenly they will brown.
Roughly chop the tomatoes. There is no need to chop them very finely because they will break down completely during cooking anyway.
Peel the potatoes and cut them into large even chunks. Pieces that are too small will dissolve into the gravy before the beef is done. Keep them big, roughly 5 to 6 cm across.
Measure all your ground spices into a small bowl and keep the garam masala in a separate bowl on the side. It goes in at a completely different time.
Chef's Tip:
Pat the beef very dry. This single step makes a real difference to how the meat browns in the pan. If you skip it you will end up steaming the beef instead of searing it and the masala will take much longer to come together
Fry the Whole Spices, Onions and Ginger Garlic
Heat the oil in a wide heavy bottomed pot over medium high heat. Drop one thin onion slice in. If it sizzles right away the oil is ready.
Add the black cardamom, cinnamon stick, cloves and black peppercorns directly into the hot oil. Let them fry for about 30 seconds. You will hear them start to crackle and the oil will smell warm and fragrant. That is exactly what you want.
Add the sliced onions now and cook on medium heat for 12 to 15 minutes, stirring regularly, until they turn a deep golden brown color. They should look noticeably dark and have reduced quite a bit in volume.
Add the ginger garlic paste and fry it on medium heat for a full minute or two, stirring it through the onions constantly. The sharp raw smell should fully disappear before you move on. This step really matters.
Chef's Tip:
Add a small pinch of salt with the onions as they cook. Salt draws out their moisture and helps them brown more quickly and evenly. Golden brown onions give a deep savory base. Pale soft onions give a sweet watery one. These are two very different results.
Add Tomatoes and Spices and Cook Until the Oil Separates
Add the chopped tomatoes to the pan and stir everything together. Turn the heat up to medium high. Press the tomatoes against the pan with a wooden spoon to help them break down faster.
Once the tomatoes have started to soften and release their liquid, about 3 to 4 minutes, add the red chili powder, turmeric, coriander powder and salt all at once. Add two tablespoons of water so the spices do not catch and burn.
Fry the masala on medium heat for another 6 to 8 minutes, stirring often. It will go wet first as the tomato liquid comes out and then gradually tighten and darken as the moisture cooks off.
Keep cooking until you can clearly see the oil separating around the edges of the masala. The mixture should look thick, almost jammy, and the color should have deepened from a bright orange to a darker red brown. This is your first checkpoint. Do not move on until you reach it.
Chef's Tip:
If the masala sticks to the pan before the oil has separated the heat is just a little too high. Drop it down and add a small splash of water. The spices need time to cook slowly in moisture. If you rush this stage by cranking the heat you will end up with a bitter burned masala and no amount of extra cooking will fix that.
Add the Beef and Do the Bhunai
Add the washed and dried beef pieces to the masala and stir well so every piece gets fully coated.
Turn the heat up to medium high and fry the beef in the masala for 8 to 10 minutes without putting a lid on. Stir every minute or so. The beef will release water as it heats up, the pan will get wetter and the masala will loosen up. That is completely normal.
Keep frying until all that water has cooked off and the masala is clinging tightly to the beef again. The oil should separate for the second time around the edges of the pan. The beef pieces should look like they have been properly coated and a little browned on the outside.
This stage is the bhunai and it is what gives the dish its depth. It can feel like nothing is happening for a few minutes but then suddenly the water evaporates and the masala tightens and the aroma changes. When you reach that moment the bhunai is done.
Chef's Tip:
Do not be tempted to put the lid on during this stage even if it looks dry. The whole point is to drive off the moisture so the masala and meat develop some color together. A lid traps steam and slows the whole process down. Keep it uncovered and keep stirring.
Add Water and Let the Beef Simmer Until Almost Done
Add enough water to just cover the beef, roughly 2 to 2.5 cups. Stir to bring the masala up from the bottom and mix it through the water.
Bring the pot to a boil on high heat then reduce to low medium heat. Put the lid on and let the beef simmer for 35 to 40 minutes, stirring every 10 minutes or so. The beef should be about 70 to 80 percent done at this point. You should be able to press a piece with a spoon and feel it starting to give but not fully tender yet.
Now add the potato chunks to the pot. Stir them through the gravy so they are fully submerged. If the water looks low add half a cup more.
Put the lid back on and continue cooking on low medium heat for another 20 to 25 minutes until both the beef and potatoes are fully cooked through and tender.
Chef's Tip:
Taste the gravy for salt before you add the potatoes. Once the potatoes go in they will absorb the seasoning from the liquid as they cook, which can make the finished shorba taste a little less salty than it should. Adjust the salt now so the final dish is properly seasoned all the way through.
Finish with Green Chilies, Garam Masala and Fresh Coriander
Once the beef and potatoes are both tender take the lid off and turn the heat to low. Add the slit green chilies and stir them through.
Sprinkle the garam masala over the dish and fold it in gently. Let it cook for just 2 minutes on low heat. This is enough for the fragrance to come through without the garam masala losing its aroma to the heat.
Scatter a generous amount of chopped fresh coriander all over the top of the dish. Serve immediately with fresh chapati, tandoori roti or plain basmati rice.
Chef's Tip:
The shorba in Aloo Gosht should be thin and light with a beautiful layer of golden oil sitting on the surface when you serve it. If it looks too thick for your liking just stir in a little hot water and bring the pot to a quick simmer. If it looks too thin take the lid off and let it cook down uncovered on medium heat for 5 minutes.
Bhunai: The One Thing That Separates a Great Aloo Gosht from an Average One
Most people who make Aloo Gosht at home end up with something that tastes fine but lacks that soul that you get from the version made at a proper Pakistani home. The beef is cooked through, the potatoes are soft and the spices are all there but something is missing. That missing thing is almost always the bhunai.
The bhunai, that stage where you fry the meat in the masala until all the water has left the pan and the oil separates cleanly, is not just a step you do and move on from. It is where the actual flavor of the dish gets built. When the masala cooks against the beef at high heat with no moisture in the way you get proper browning, proper depth and that dark roasted undertone that makes the finished shorba taste like it has been cooking for hours.
Be patient with the bhunai and everything else in this dish will fall into place. Get that right and your Aloo Gosht will taste like home.
Nutritions
Per serving (~ 220g of beef and potato curry with shorba)
People Also Ask
Yes absolutely. Mutton is actually the more traditional choice for Aloo Gosht in many Pakistani homes. The flavor is slightly different because mutton has a stronger natural taste than beef but the method stays exactly the same. Just be aware that mutton from a younger animal tends to cook in a similar time to beef while older goat meat can take an extra 15 to 20 minutes to become fully tender. Check it after the first simmer and give it a little more time if the pieces still feel firm before adding the potatoes.
This almost always comes down to one of two things. Either the bhunai was not done properly before the water was added, which means the masala still has raw water in it, or the onions were not cooked dark enough in the first place. A pale onion base gives a thin and sweet gravy rather than a rich and savory one. Make sure you cook the onions until genuinely golden brown and then complete the full bhunai with the meat before adding any water. Those two steps alone will fix a watery Aloo Gosht almost every single time.
The potatoes are going in too early or being cut too small. Always wait until the beef is at least 70 percent done before adding the potatoes and cut the chunks large, at least 5 to 6 cm wide. Smaller pieces fall apart before the meat has finished cooking. Also make sure you are cooking on a gentle simmer with the lid on once the potatoes are in rather than a rolling boil. A hard boil will break the potato chunks apart no matter how big they are.
Store it in a sealed container in the fridge for up to two days. When reheating add two or three tablespoons of water to the pot and warm it on low heat with the lid on, stirring gently every few minutes. If you want to freeze it for longer storage remove the potatoes first because potatoes do not freeze well and become grainy and unpleasant when thawed. Freeze just the beef and masala for up to two months and cook fresh potatoes into it when you are ready to eat. The flavor is actually slightly better the next day because all the spices have had time to settle and deepen overnight.